SpringCloudAlibaba

最流行的微服务框架
简介

Nacos服务注册与配置中心
Nacos = Eureka + Config + Bus
下载安装
下载**nacos1.2.1版本**
centos启动
1 | |
访问
1 | |
注册服务
nacos自带负载均衡,整合了Ribbon
父工程pom
1 | |
子工程pom
1 | |
yml
1 | |
启动类
1 | |
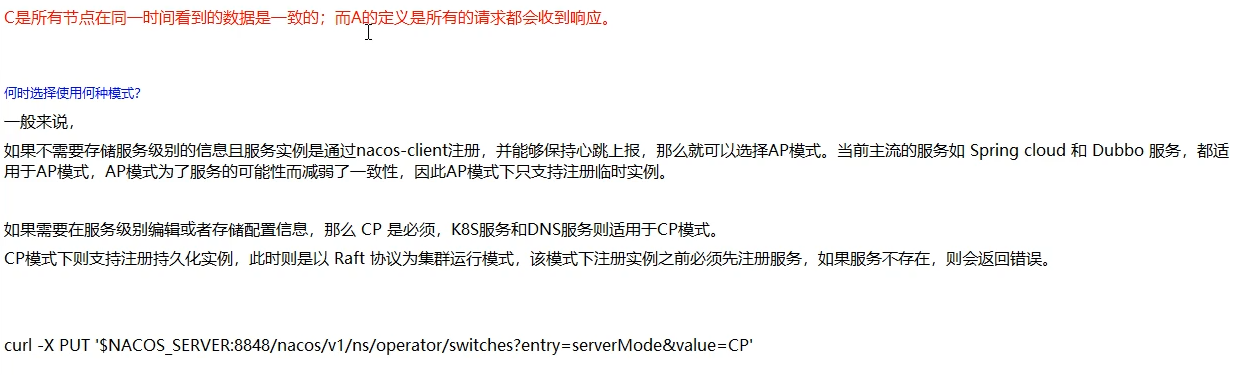
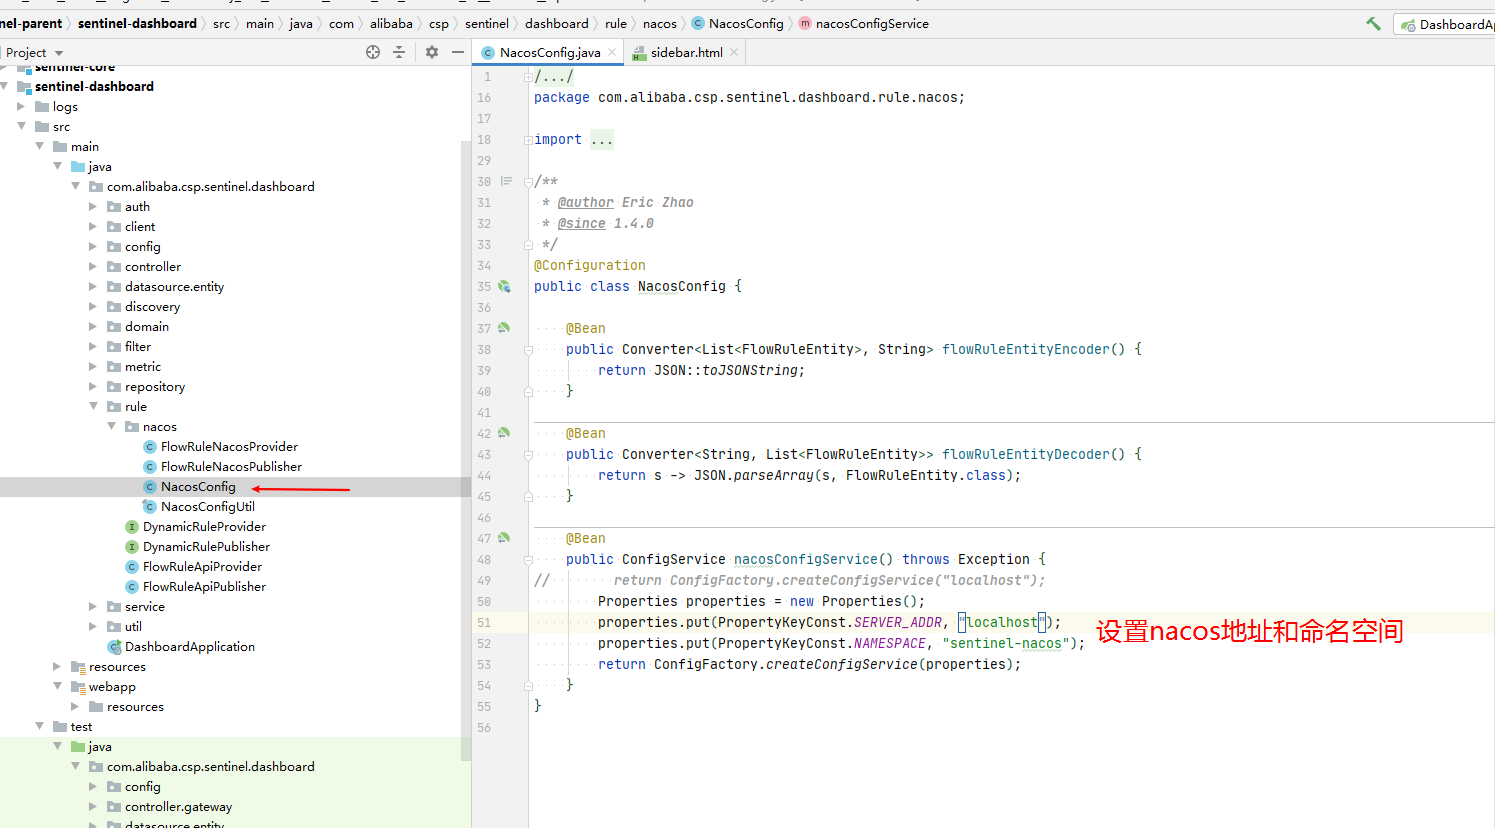
nacos切换AP和CP
配置中心

pom
1 | |
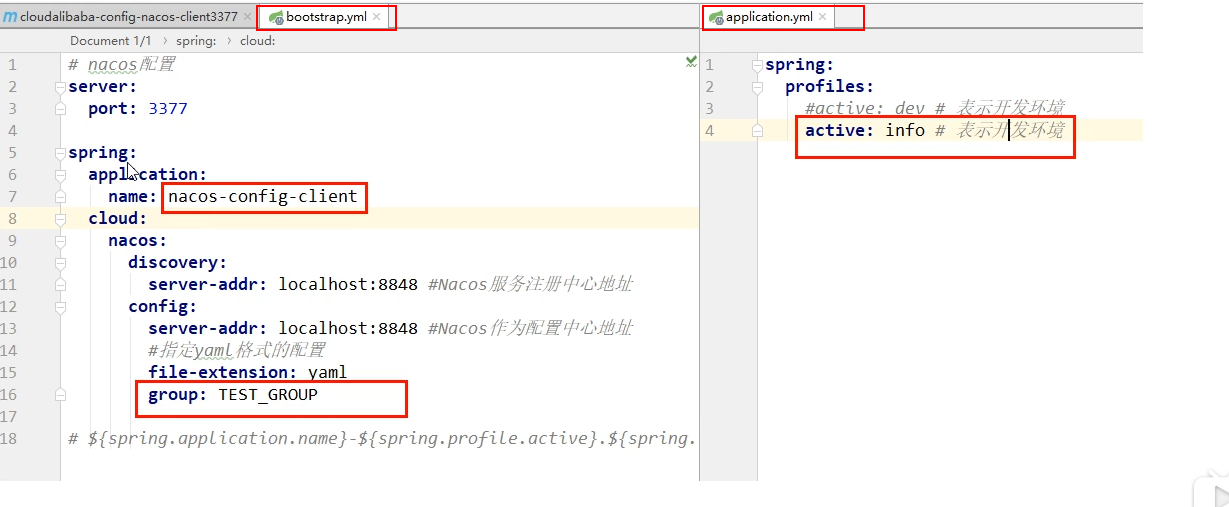
boostrap.yml
1 | |
application.yml
1 | |
启动类
1 | |
业务类
1 | |
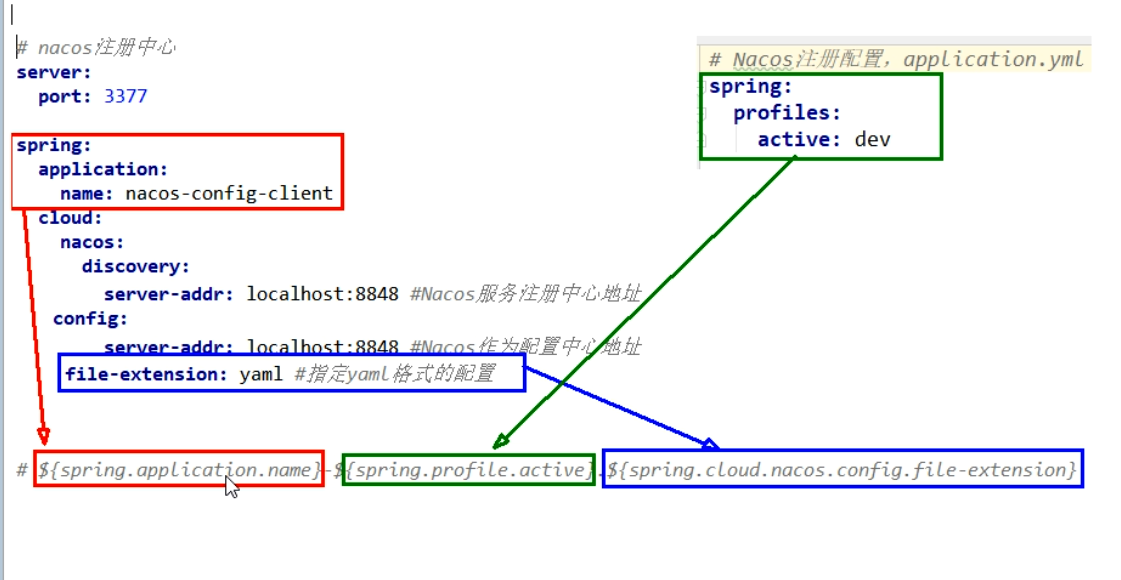
配置Id规则
prefix默认为spring.application.name的值
spring.profile.active既为当前环境对应的profile,可以通过配置项spring.profile.active
file-exetension为配置内容的数据格式,可以通过配置项spring.cloud.nacos.config.file-extension配置
1 | |
分类配置
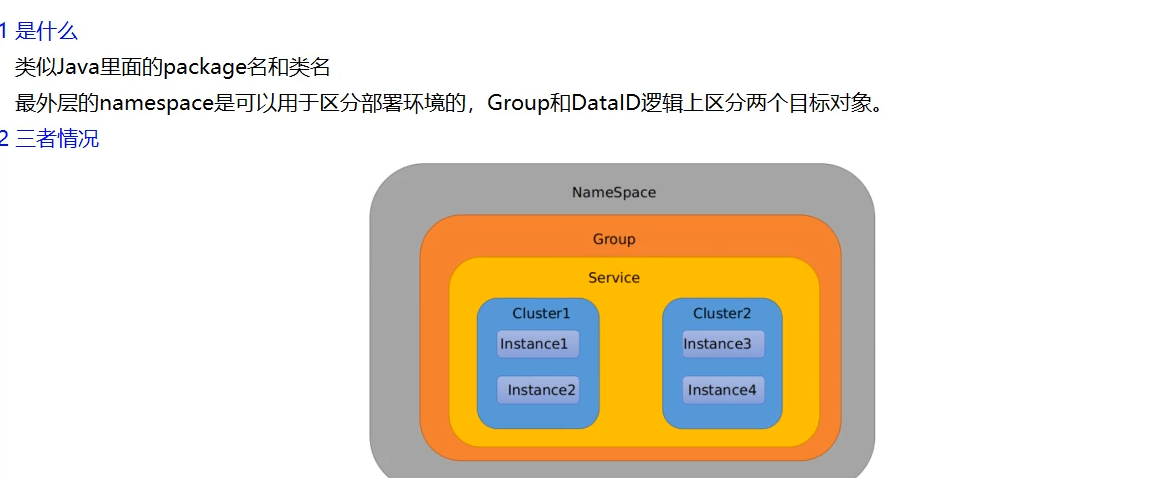
DataID方案
指定spring.profile.active和配置文件的DataID来使不同环境下读取不同的配置

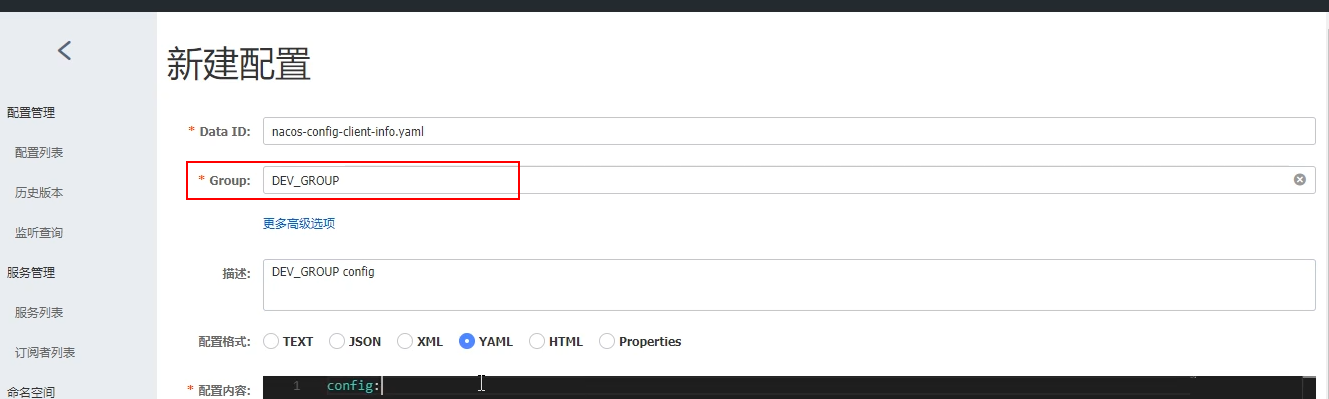
Group方案
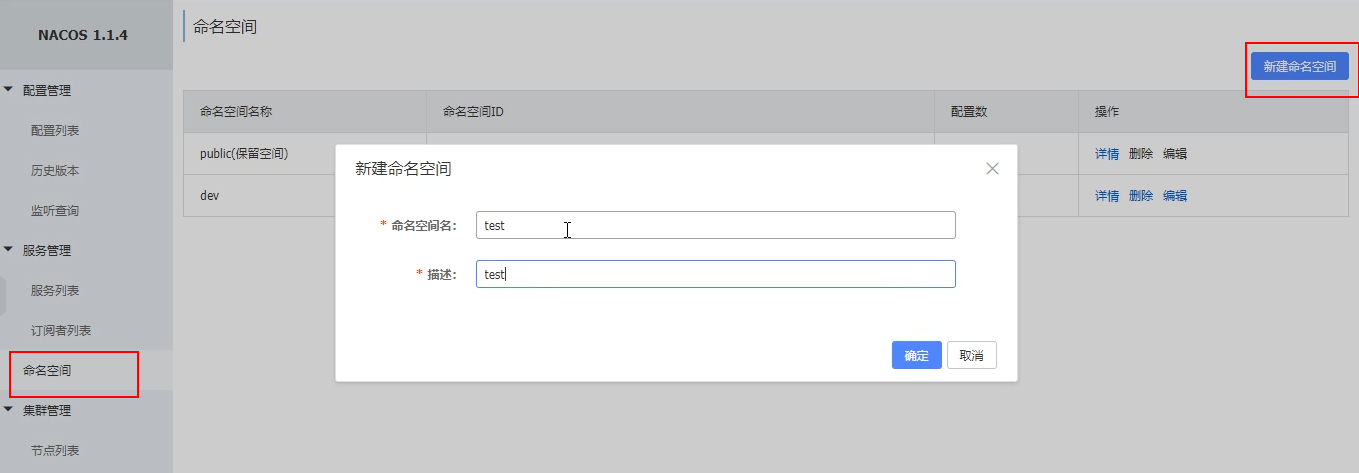
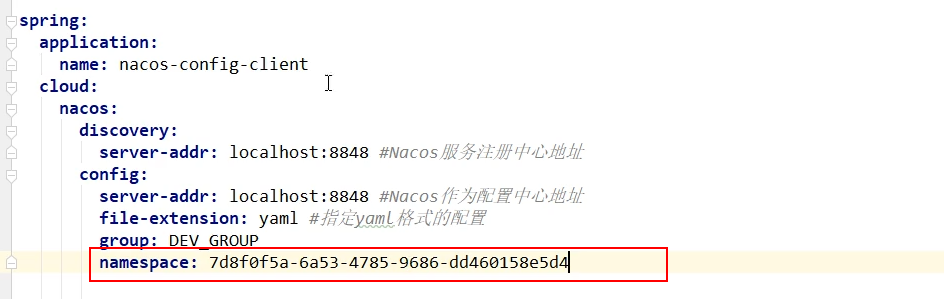
NameSpace方案
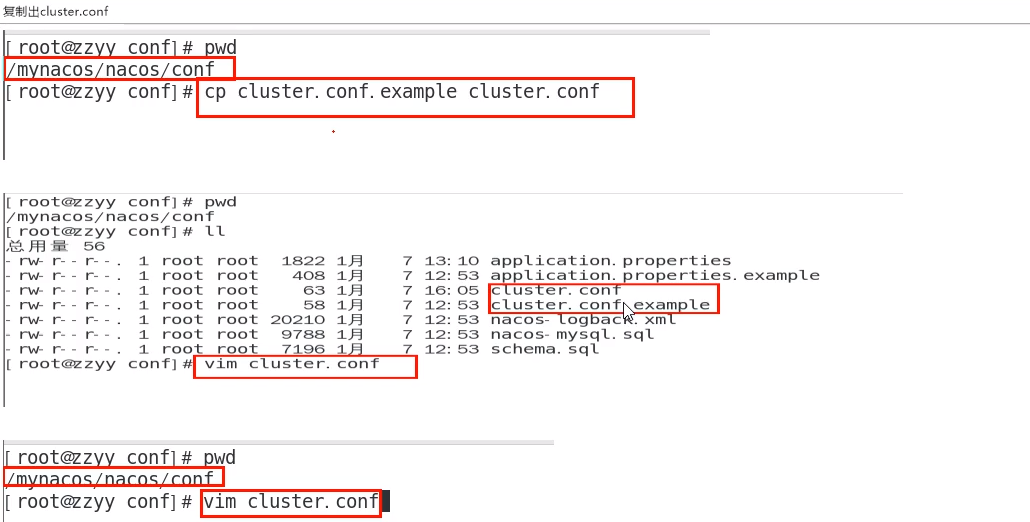
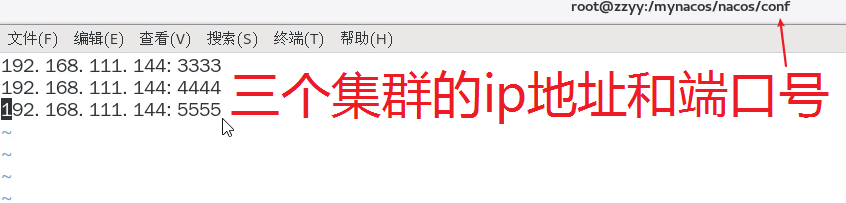
Nacos集群
切换到Mysql数据库
nacos默认自带的是嵌入式数据库derby
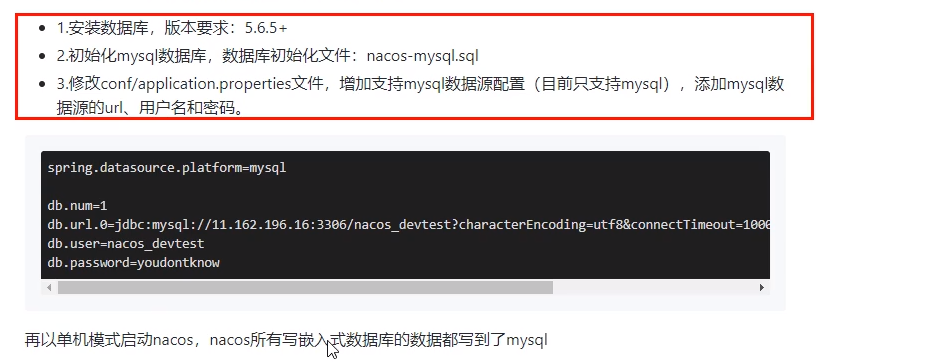
切换数据源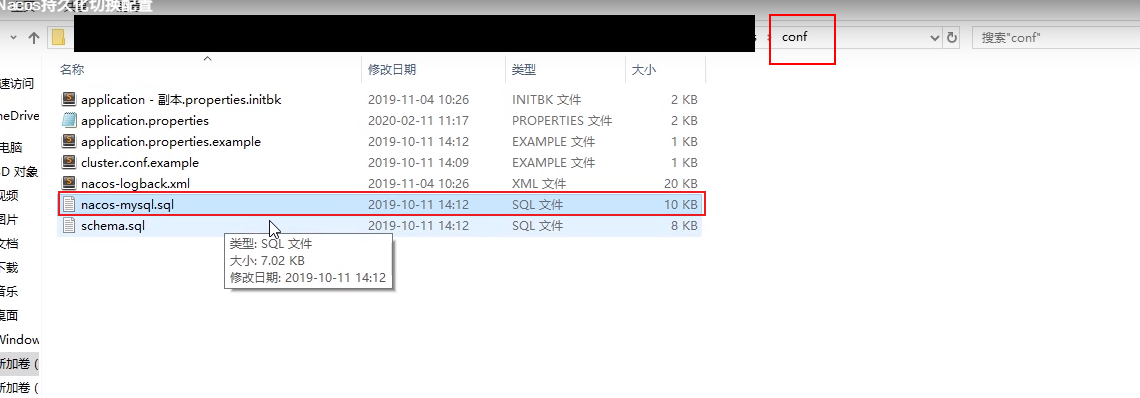
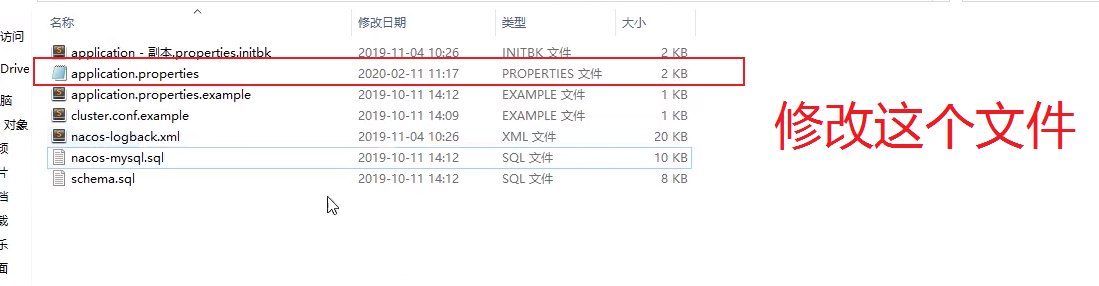
application文件添加以下内容
1 | |
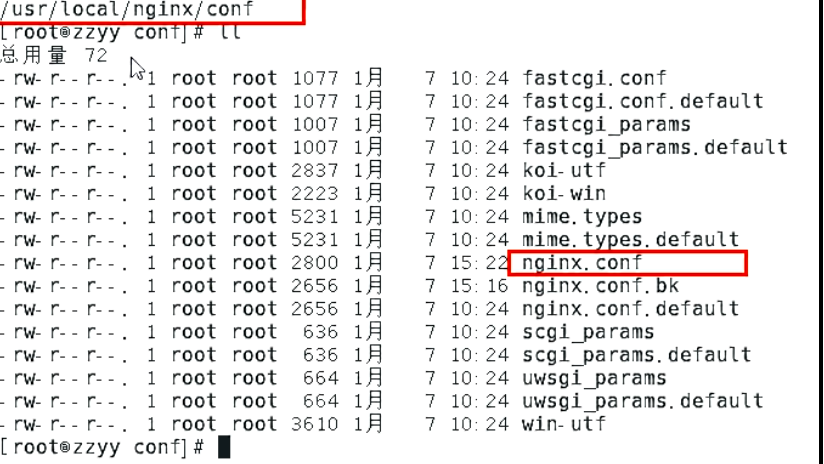
配置cluster文件
修改startup.sh脚本


使用新命令启动
1 | |
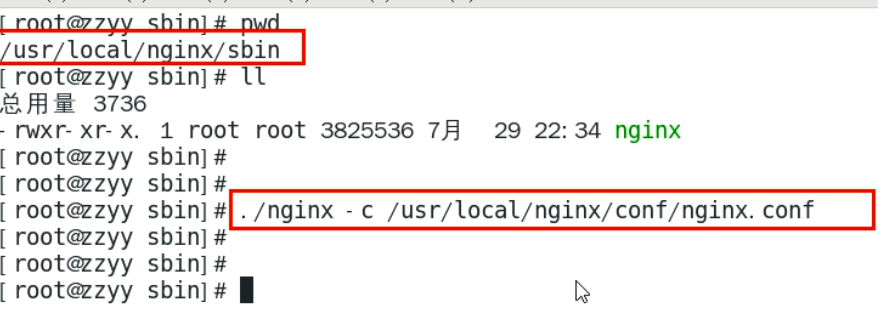
配置Nginx
添加配置
1 | |
通过nginx访问nacos集群
1 | |
配置服务进集群
1 | |
Seata分布式事务
简介
XID
全局事务唯一IDTC - 事务协调者
维护全局和分支事务的状态,驱动全局事务提交或回滚。TM - 事务管理器
定义全局事务的范围:开始全局事务、提交或回滚全局事务。RM - 资源管理器
管理分支事务处理的资源,与TC交谈以注册分支事务和报告分支事务的状态,并驱动分支事务提交或回滚。
处理流程
- TM向TC申请开启一个全局事务,全局事务创建成功并创建生成一个全局唯一的XID
- XID在微服务调用链路的上下文中传播
- RM向TC注册支事务,将其纳入XID对应全局事务的管辖
- TM向TC发起针对XID的全局提交或回滚决议
- TC调度XID下管辖的全部分支事务完成提交或回滚请求

使用
修改file.conf文件

修改registry文件

添加数据库seata,运行sql脚本
1 | |
在需要使用seata的数据库中增加undo.log表
1 | |
java的pom中引入
1 | |
yml文件配置
1 | |
添加file.conf和register.conf配置文件到resource中
1 | |
1 | |
切换默认数据源
1 | |
1 | |
在需要使用事务的方法上加
1 | |
先启动注册中心==》再启动seata==》再启动业务
Linux启动
1 | |
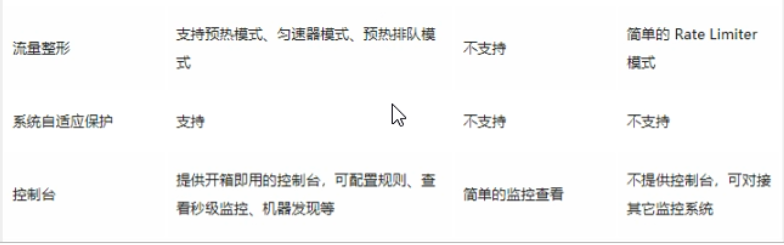
Sentinel限流
安装
docker安装
1 | |
1 | |
下载安装
1 | |
1 | |
1 | |
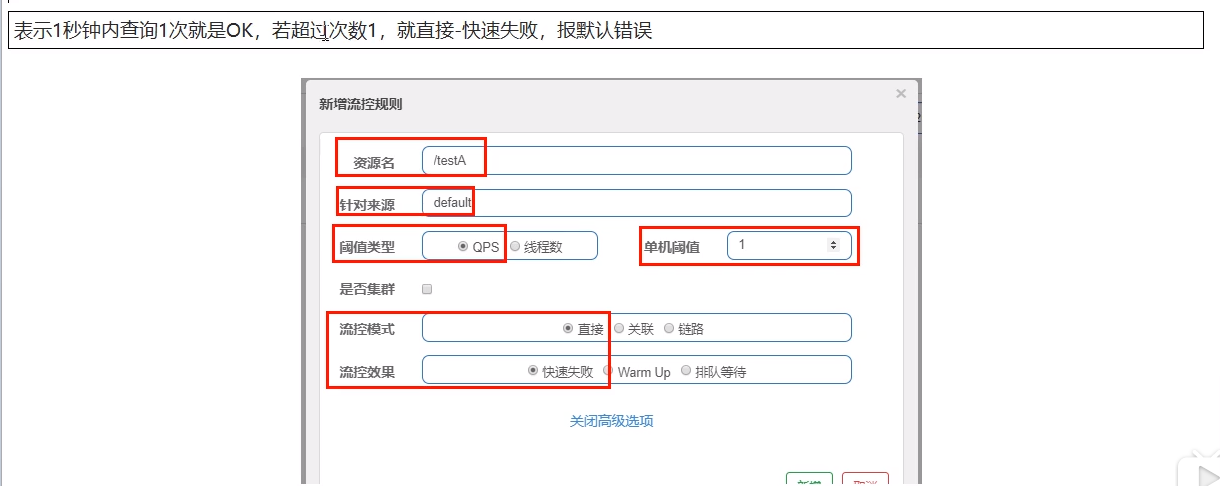
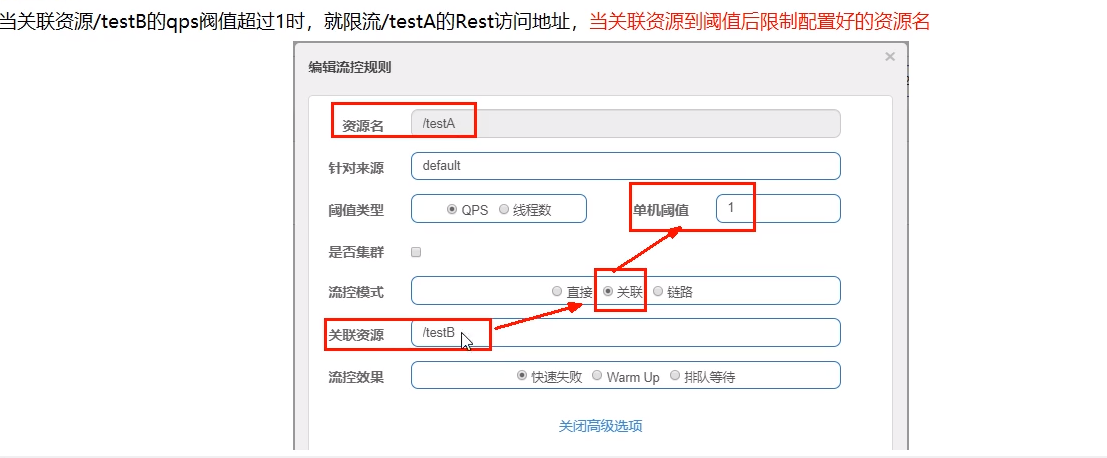
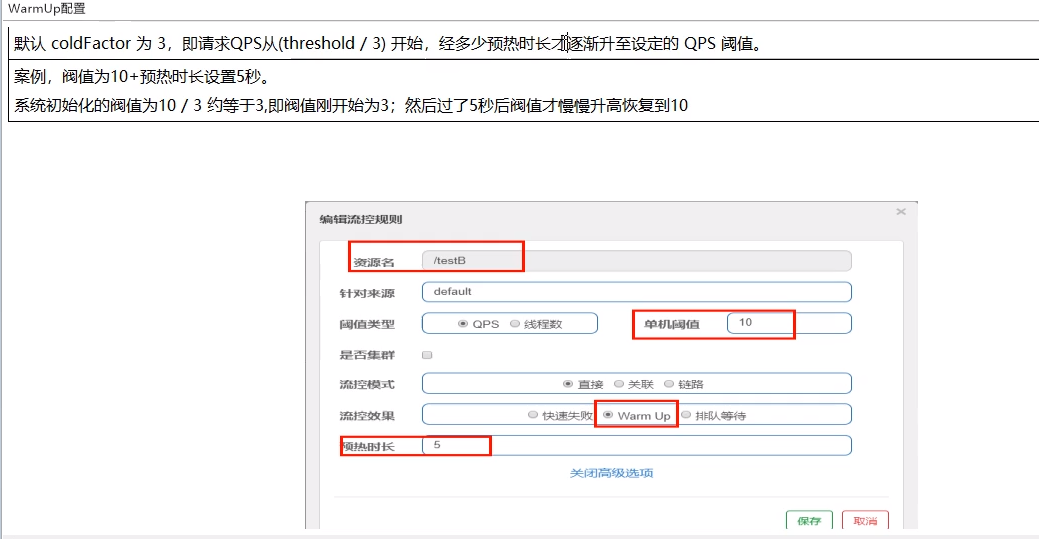
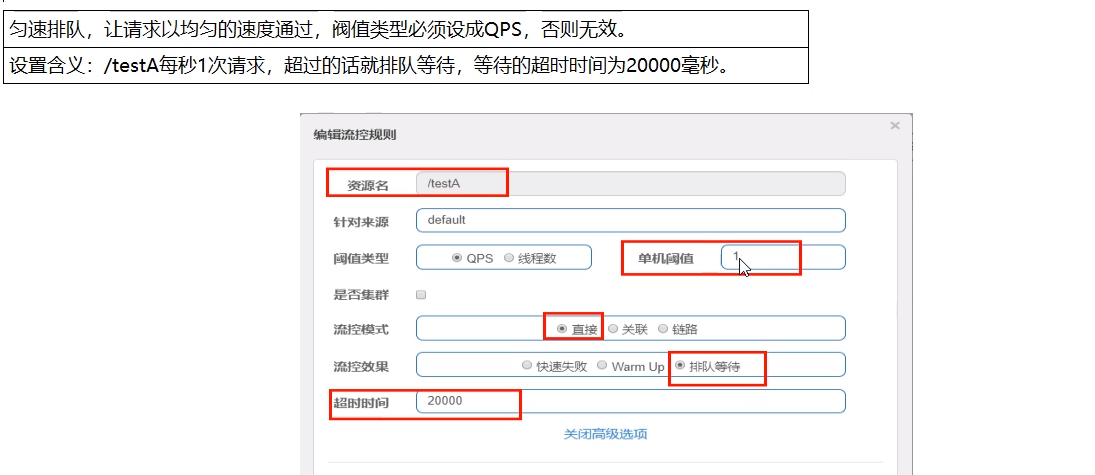
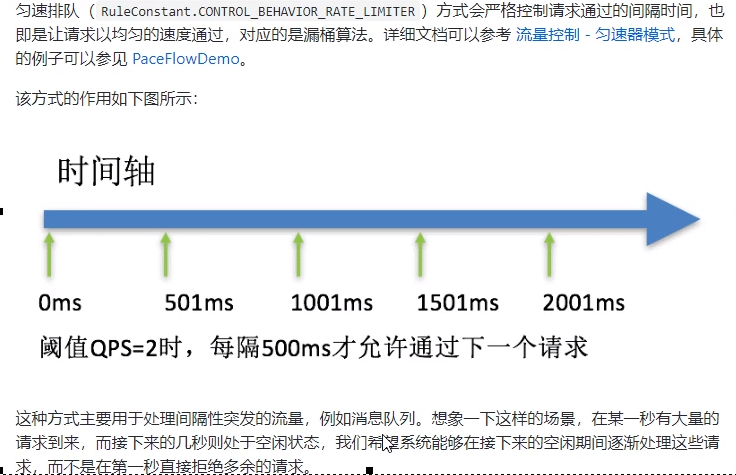
流控

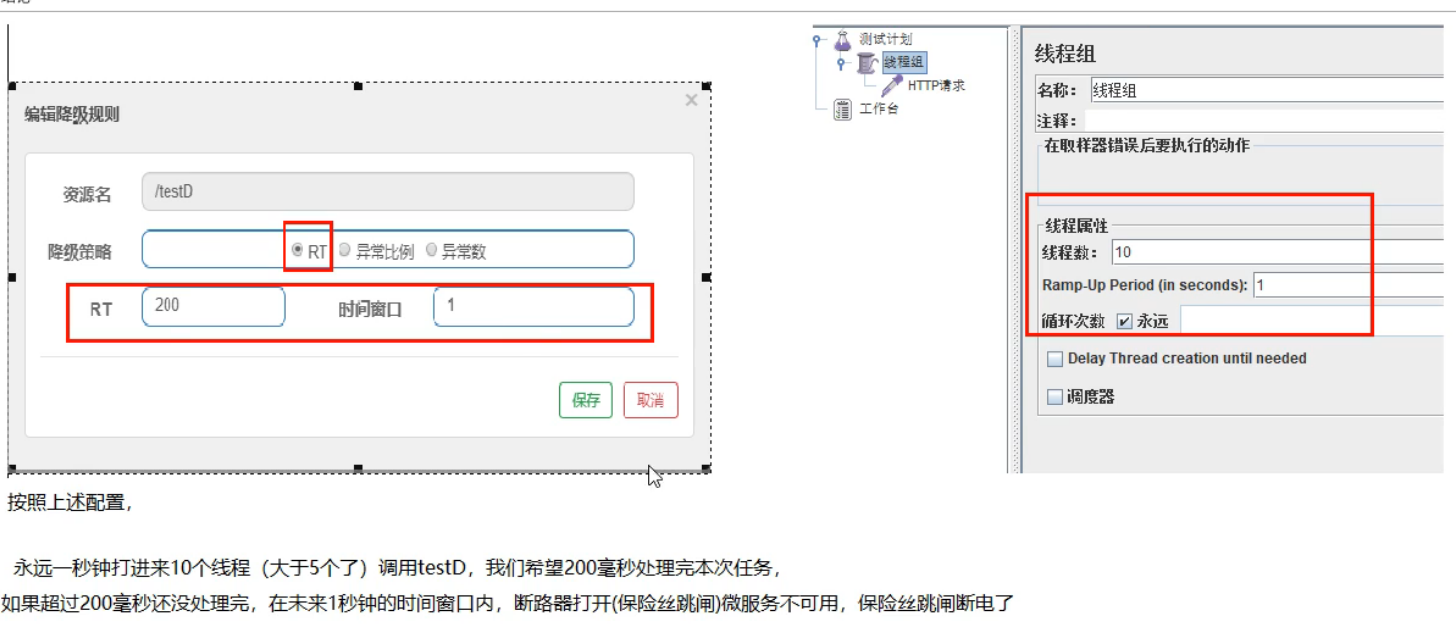
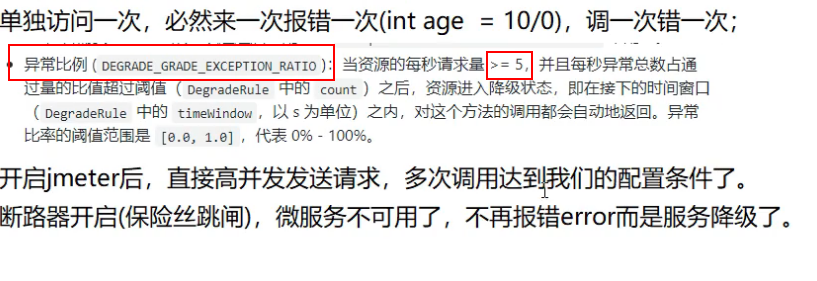
降级


热点key限流


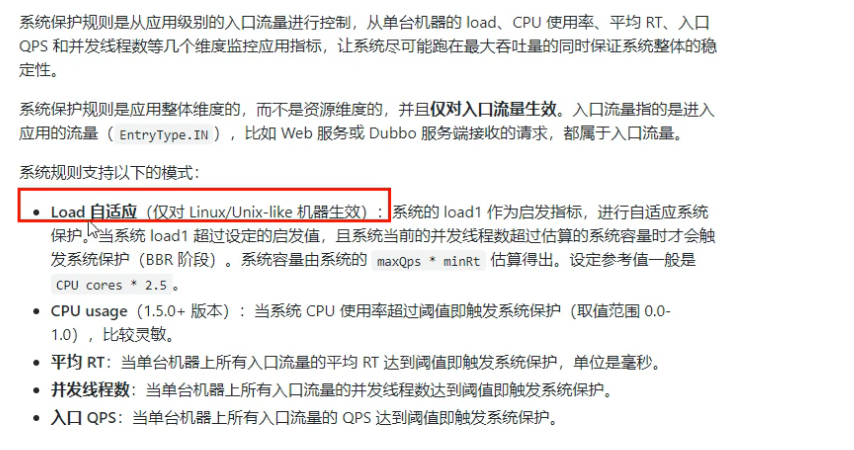
系统规则
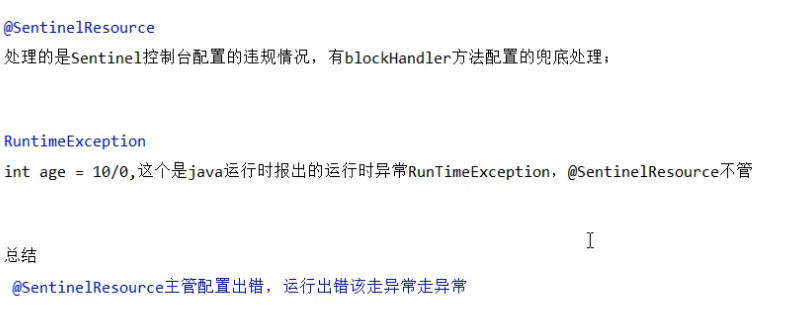
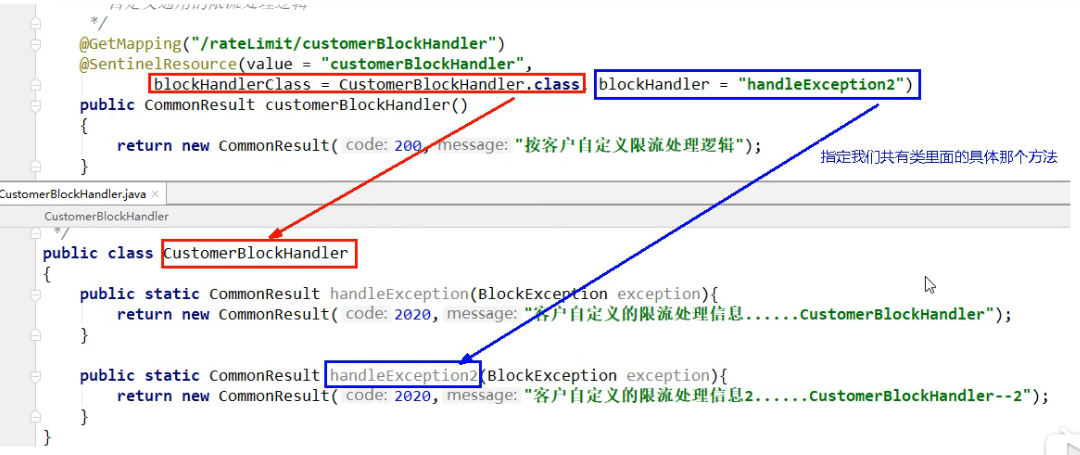
@SentinelResource
1 | |
1 | |

SpringBoot使用
pom
1 | |
yml
1 | |
规则持久化
下载sentinel源码包

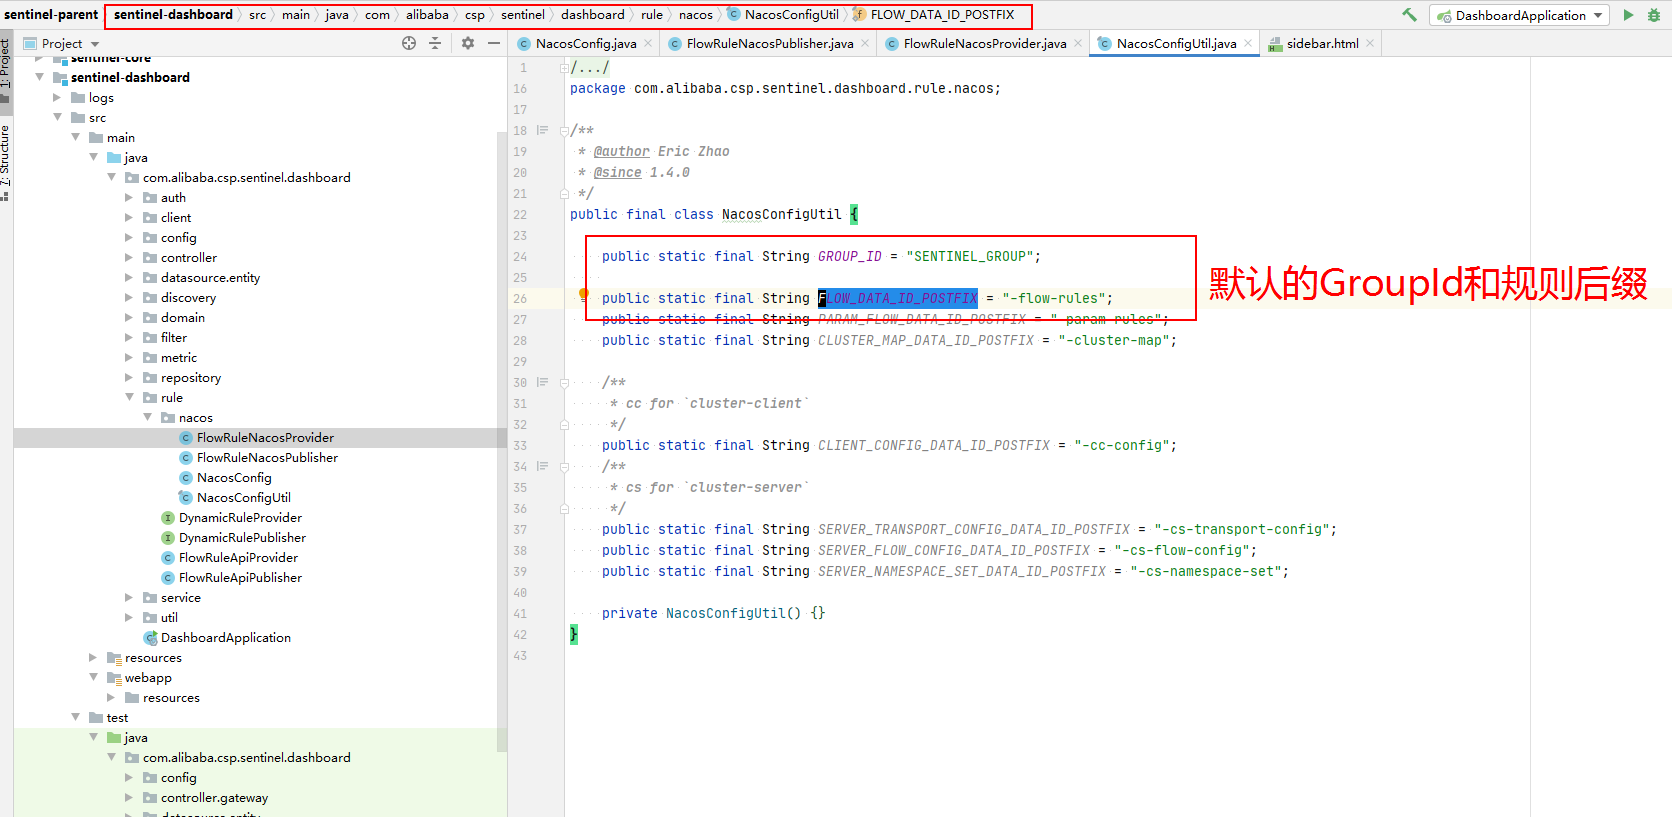
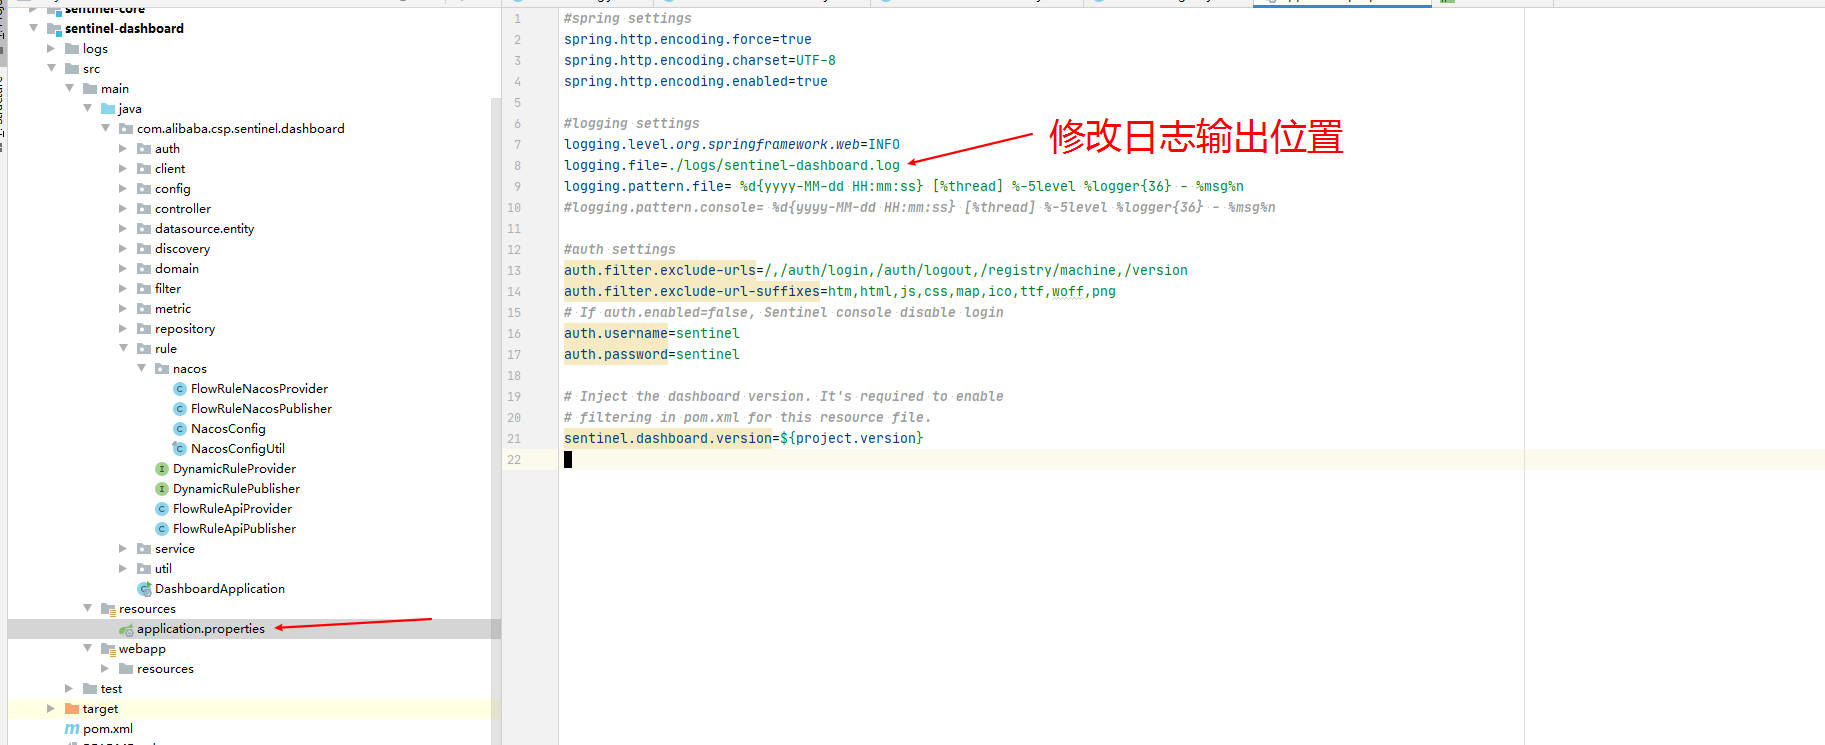
修改完成后打jar包运行
客户端使用
1 | |
1 | |
其他

注意
如果实时监控面板没有图表数据,但簇点链路有数据,说明是客户端的时间和服务端时间不一致
相关文章